For developers
Data exchange via webhooks
So, you are interested in receiving information about data changes in Keruj on your side. For this, humanity came up with such a term as "webhook". In fact, this is an HTTP POST request that will be sent to your URL at the moment when the data you need in Keruj is created/modified/deleted.
To receive data via a webhook or, simply speaking, an HTTP request for a specific data creation/modification/deletion event in Keruj, automatic scenarios are responsible
Creating a scenario
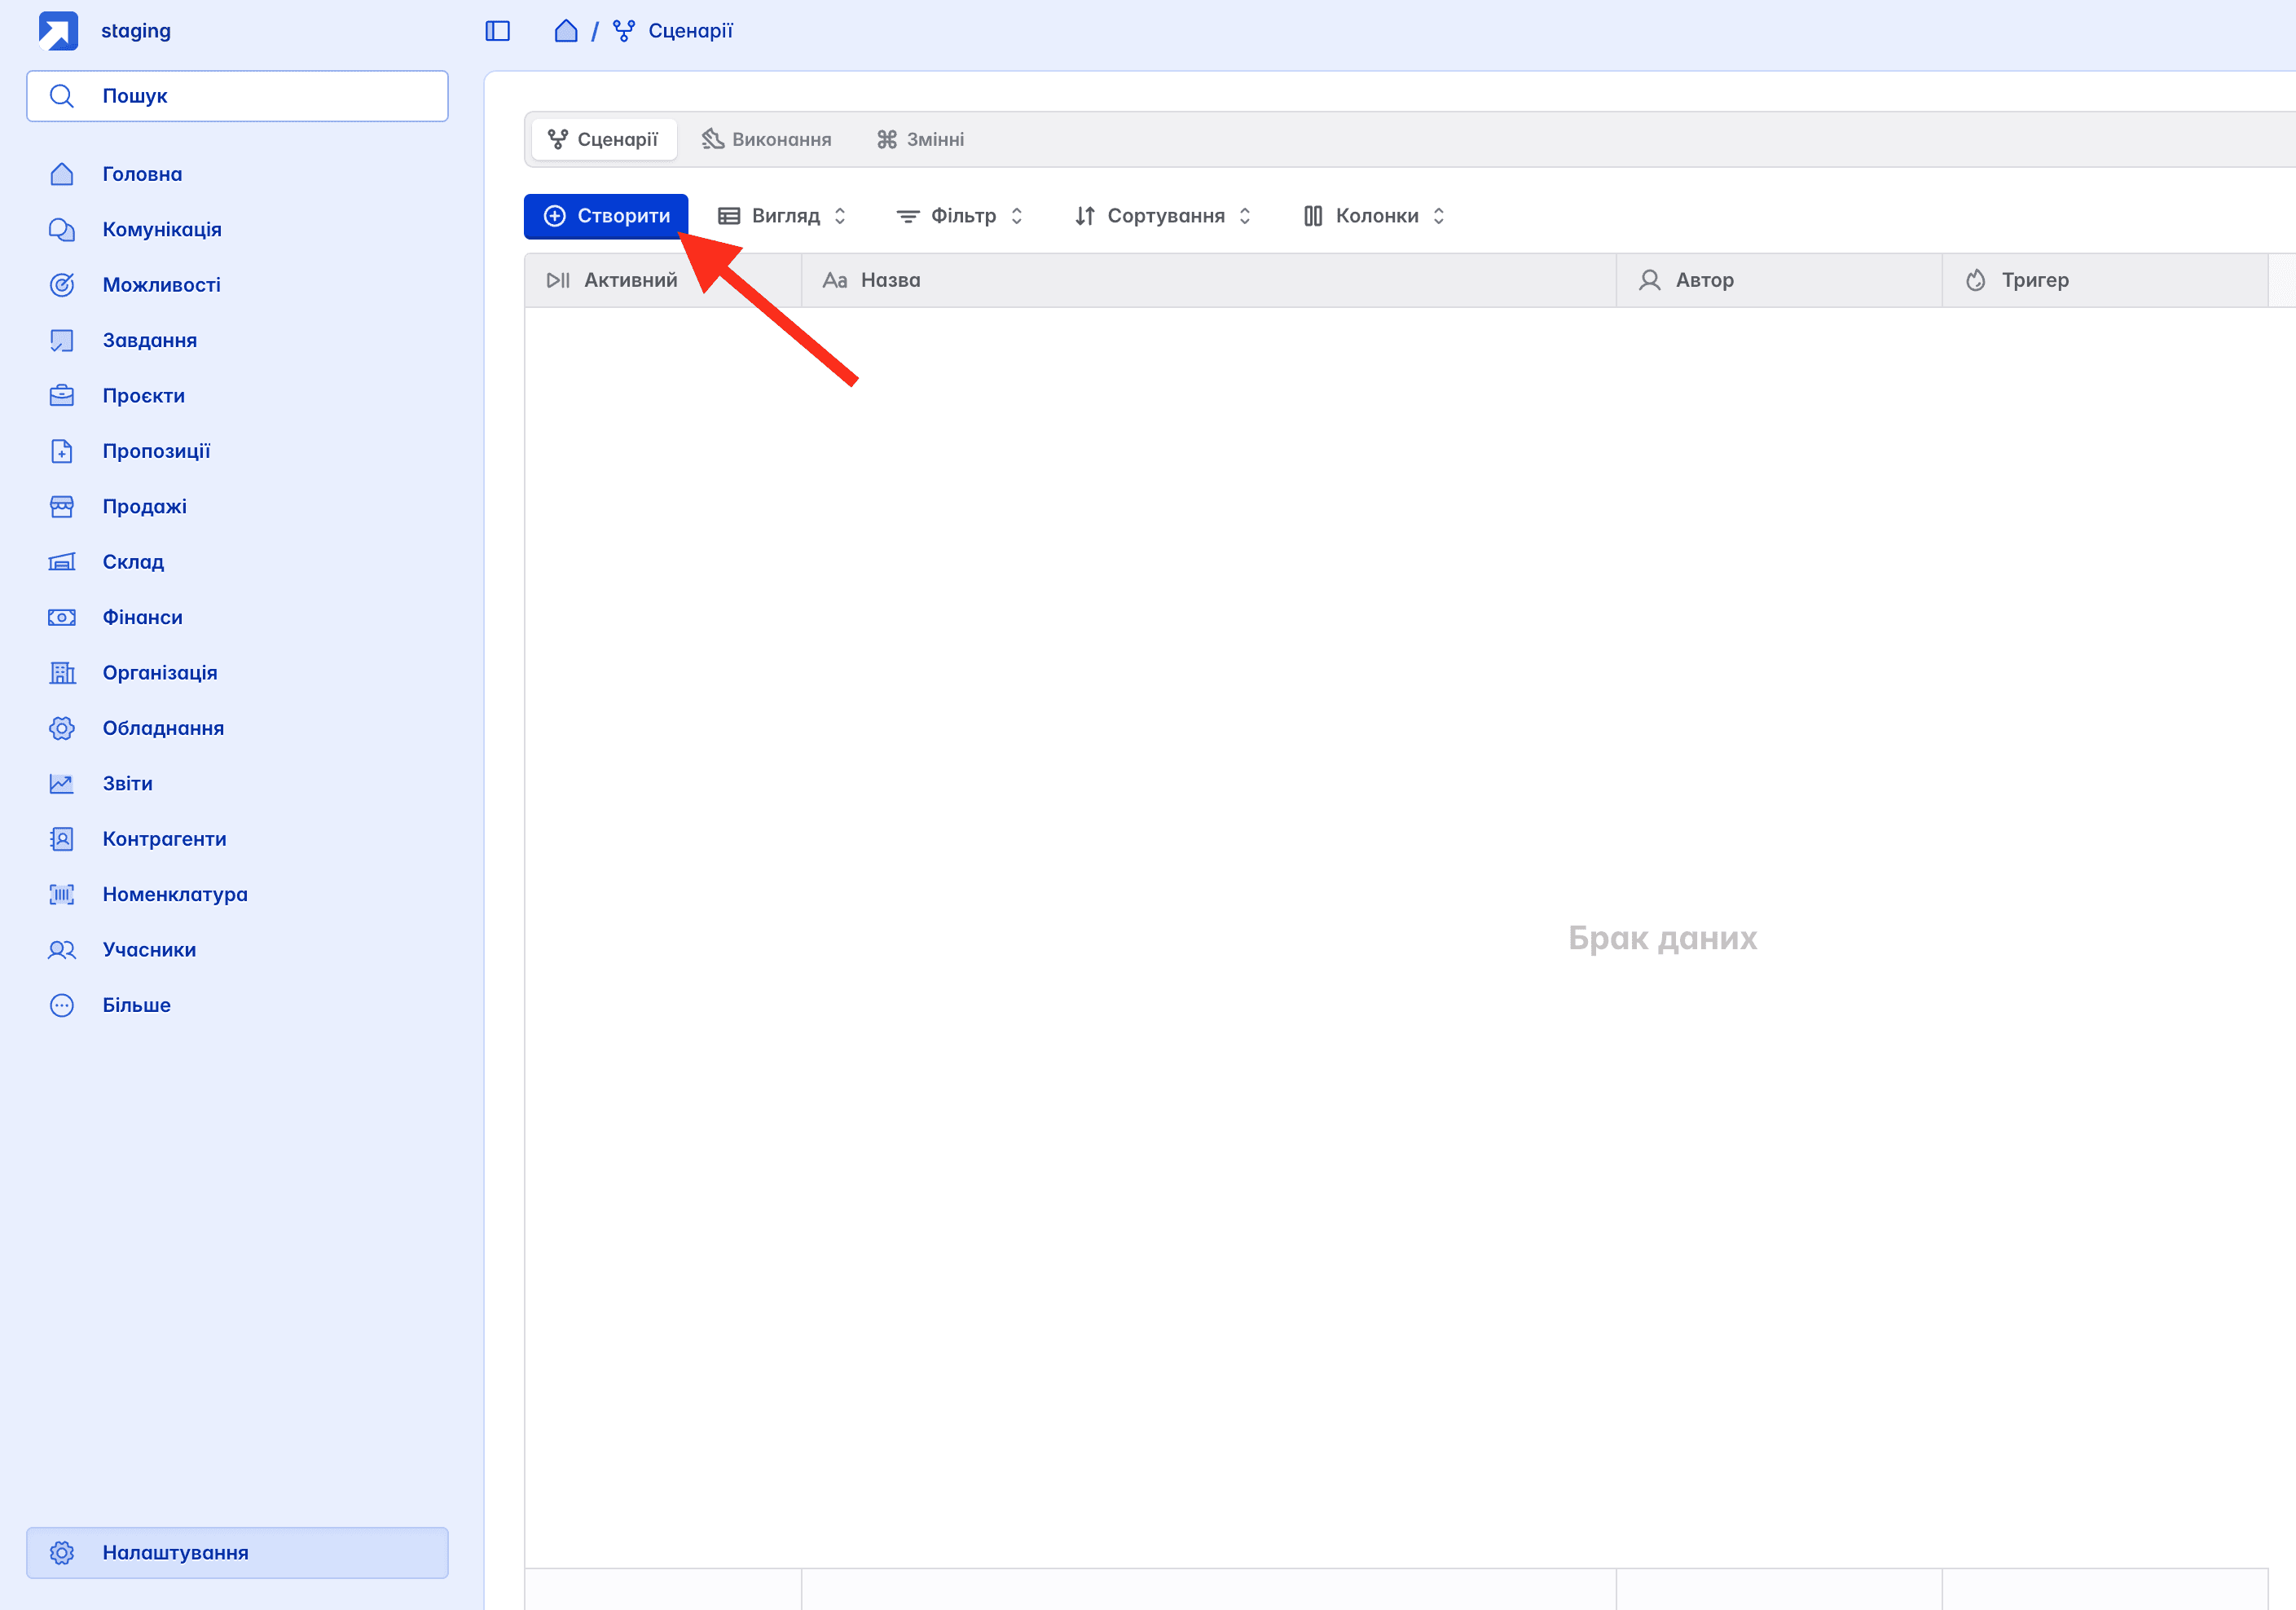
To create a scenario for receiving a webhook, you should go to Settings / Scenarios and click the Create button

In the form that appears, you should specify the scenario name, the execution context* (entity), and select the types of events to which the scenario should react
*currently, Keruj provides the ability to create scenarios only for documents. Over time, we will add more contexts.
After creating a new scenario, you will be redirected to the page for editing conditions and execution steps
Condition

In order to set the conditions under which the scenario will be triggered, you should click on the event name

After that, you will be able to add the necessary triggering conditions (trigger) for the scenario through the form
In this example, the scenario will trigger for the creation, update, or deletion of documents of type Sales Order where the author is the user Tester Petrovych
Action
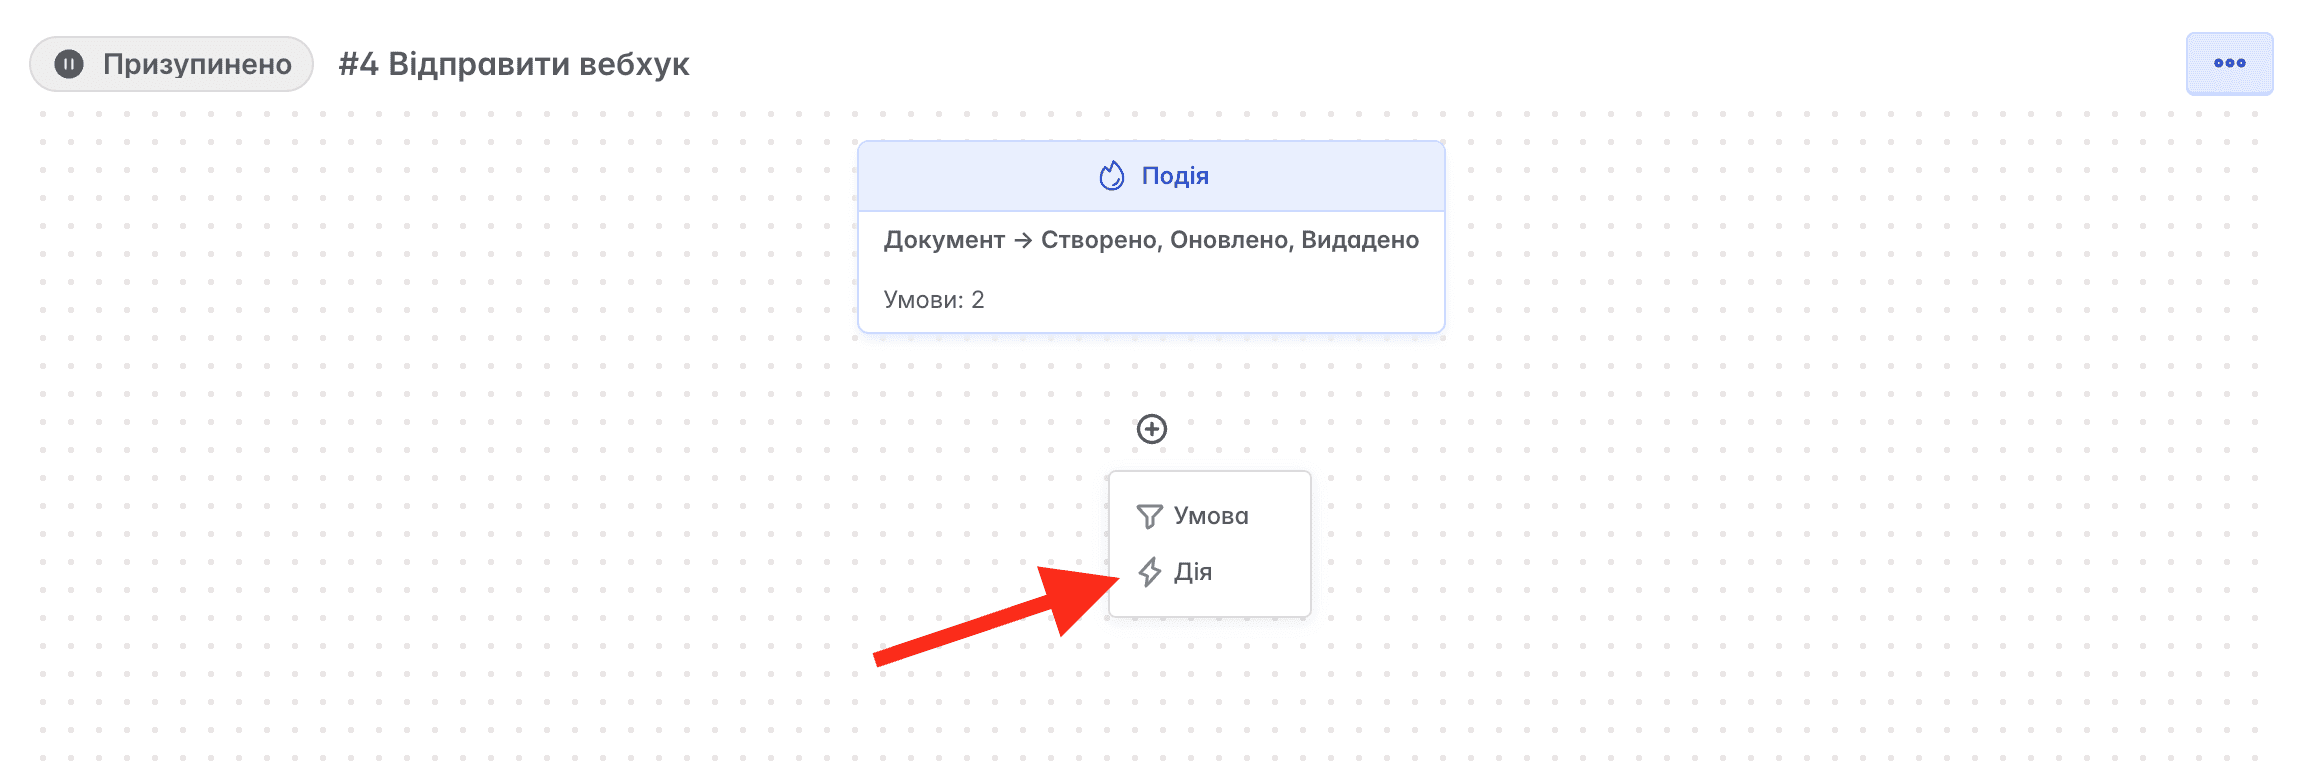
To add an action for sending an HTTP request, click on the (+) button and select Action

In the action menu, click on "Send HTTP request"
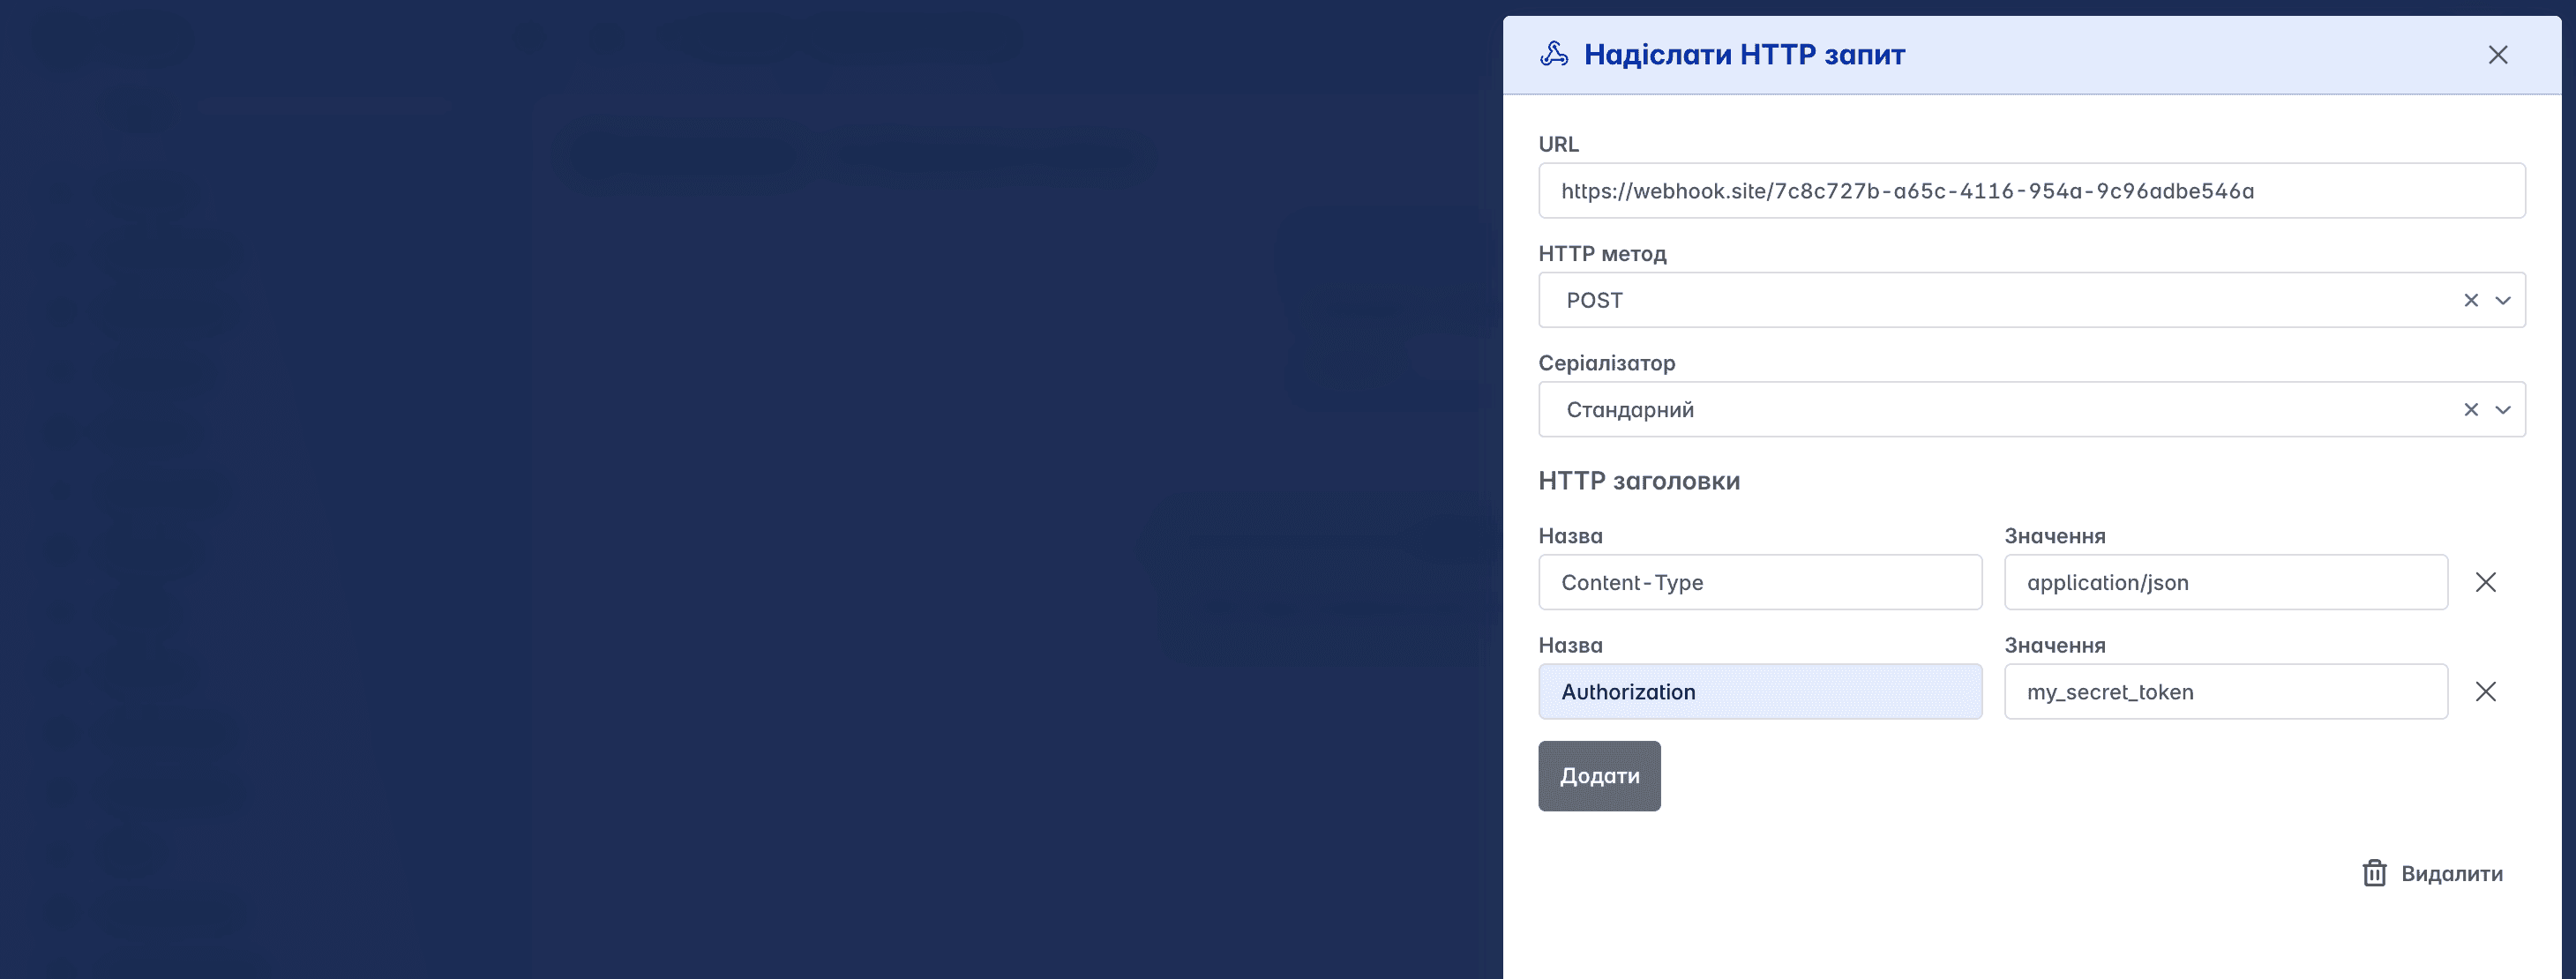
In the form that appears, you can specify
URL address where the HTTP request will be sent
HTTP method - the request method (currently only POST is available)
Serializer - the type of data serialization
HTTP headers - a list of headers that will be part of the sent request
All changes are saved automatically and do not require confirmation
Scenario activation

In order to activate the scenario, you should click on its status badge next to the name in the upper part of the editor
Only active scenarios will be executed according to the specified conditions and actions
Execution
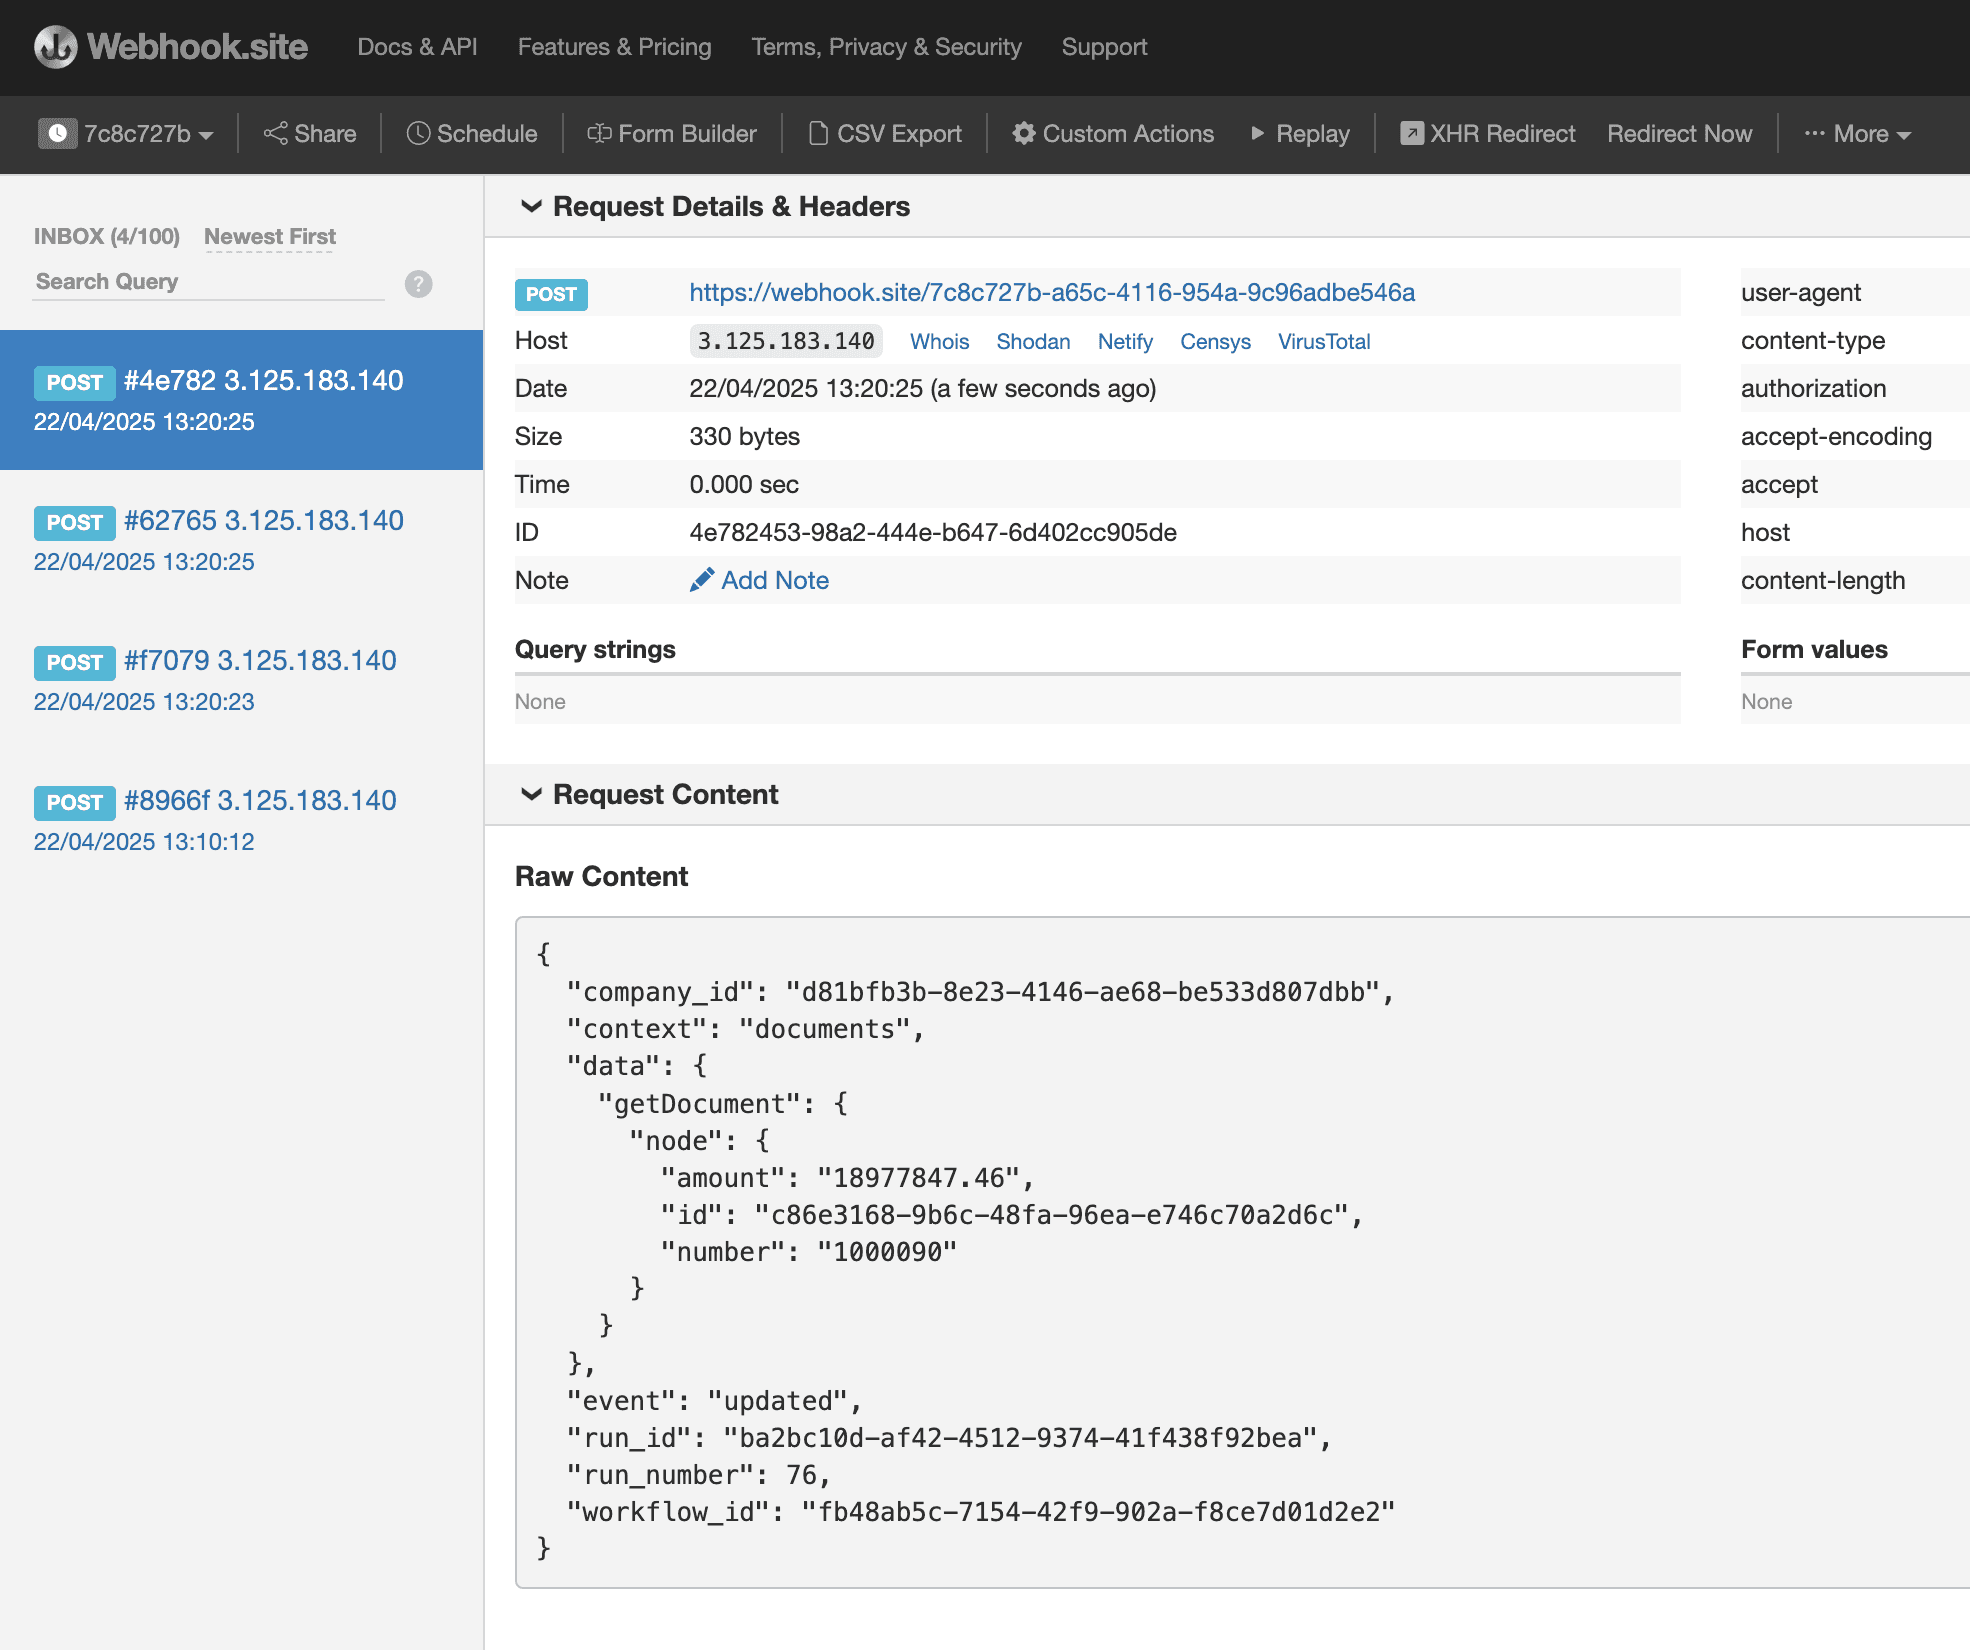
To test execution, you can try to "trigger" the necessary conditions. For testing, we recommend trying the excellent shareware service https://webhook.site/
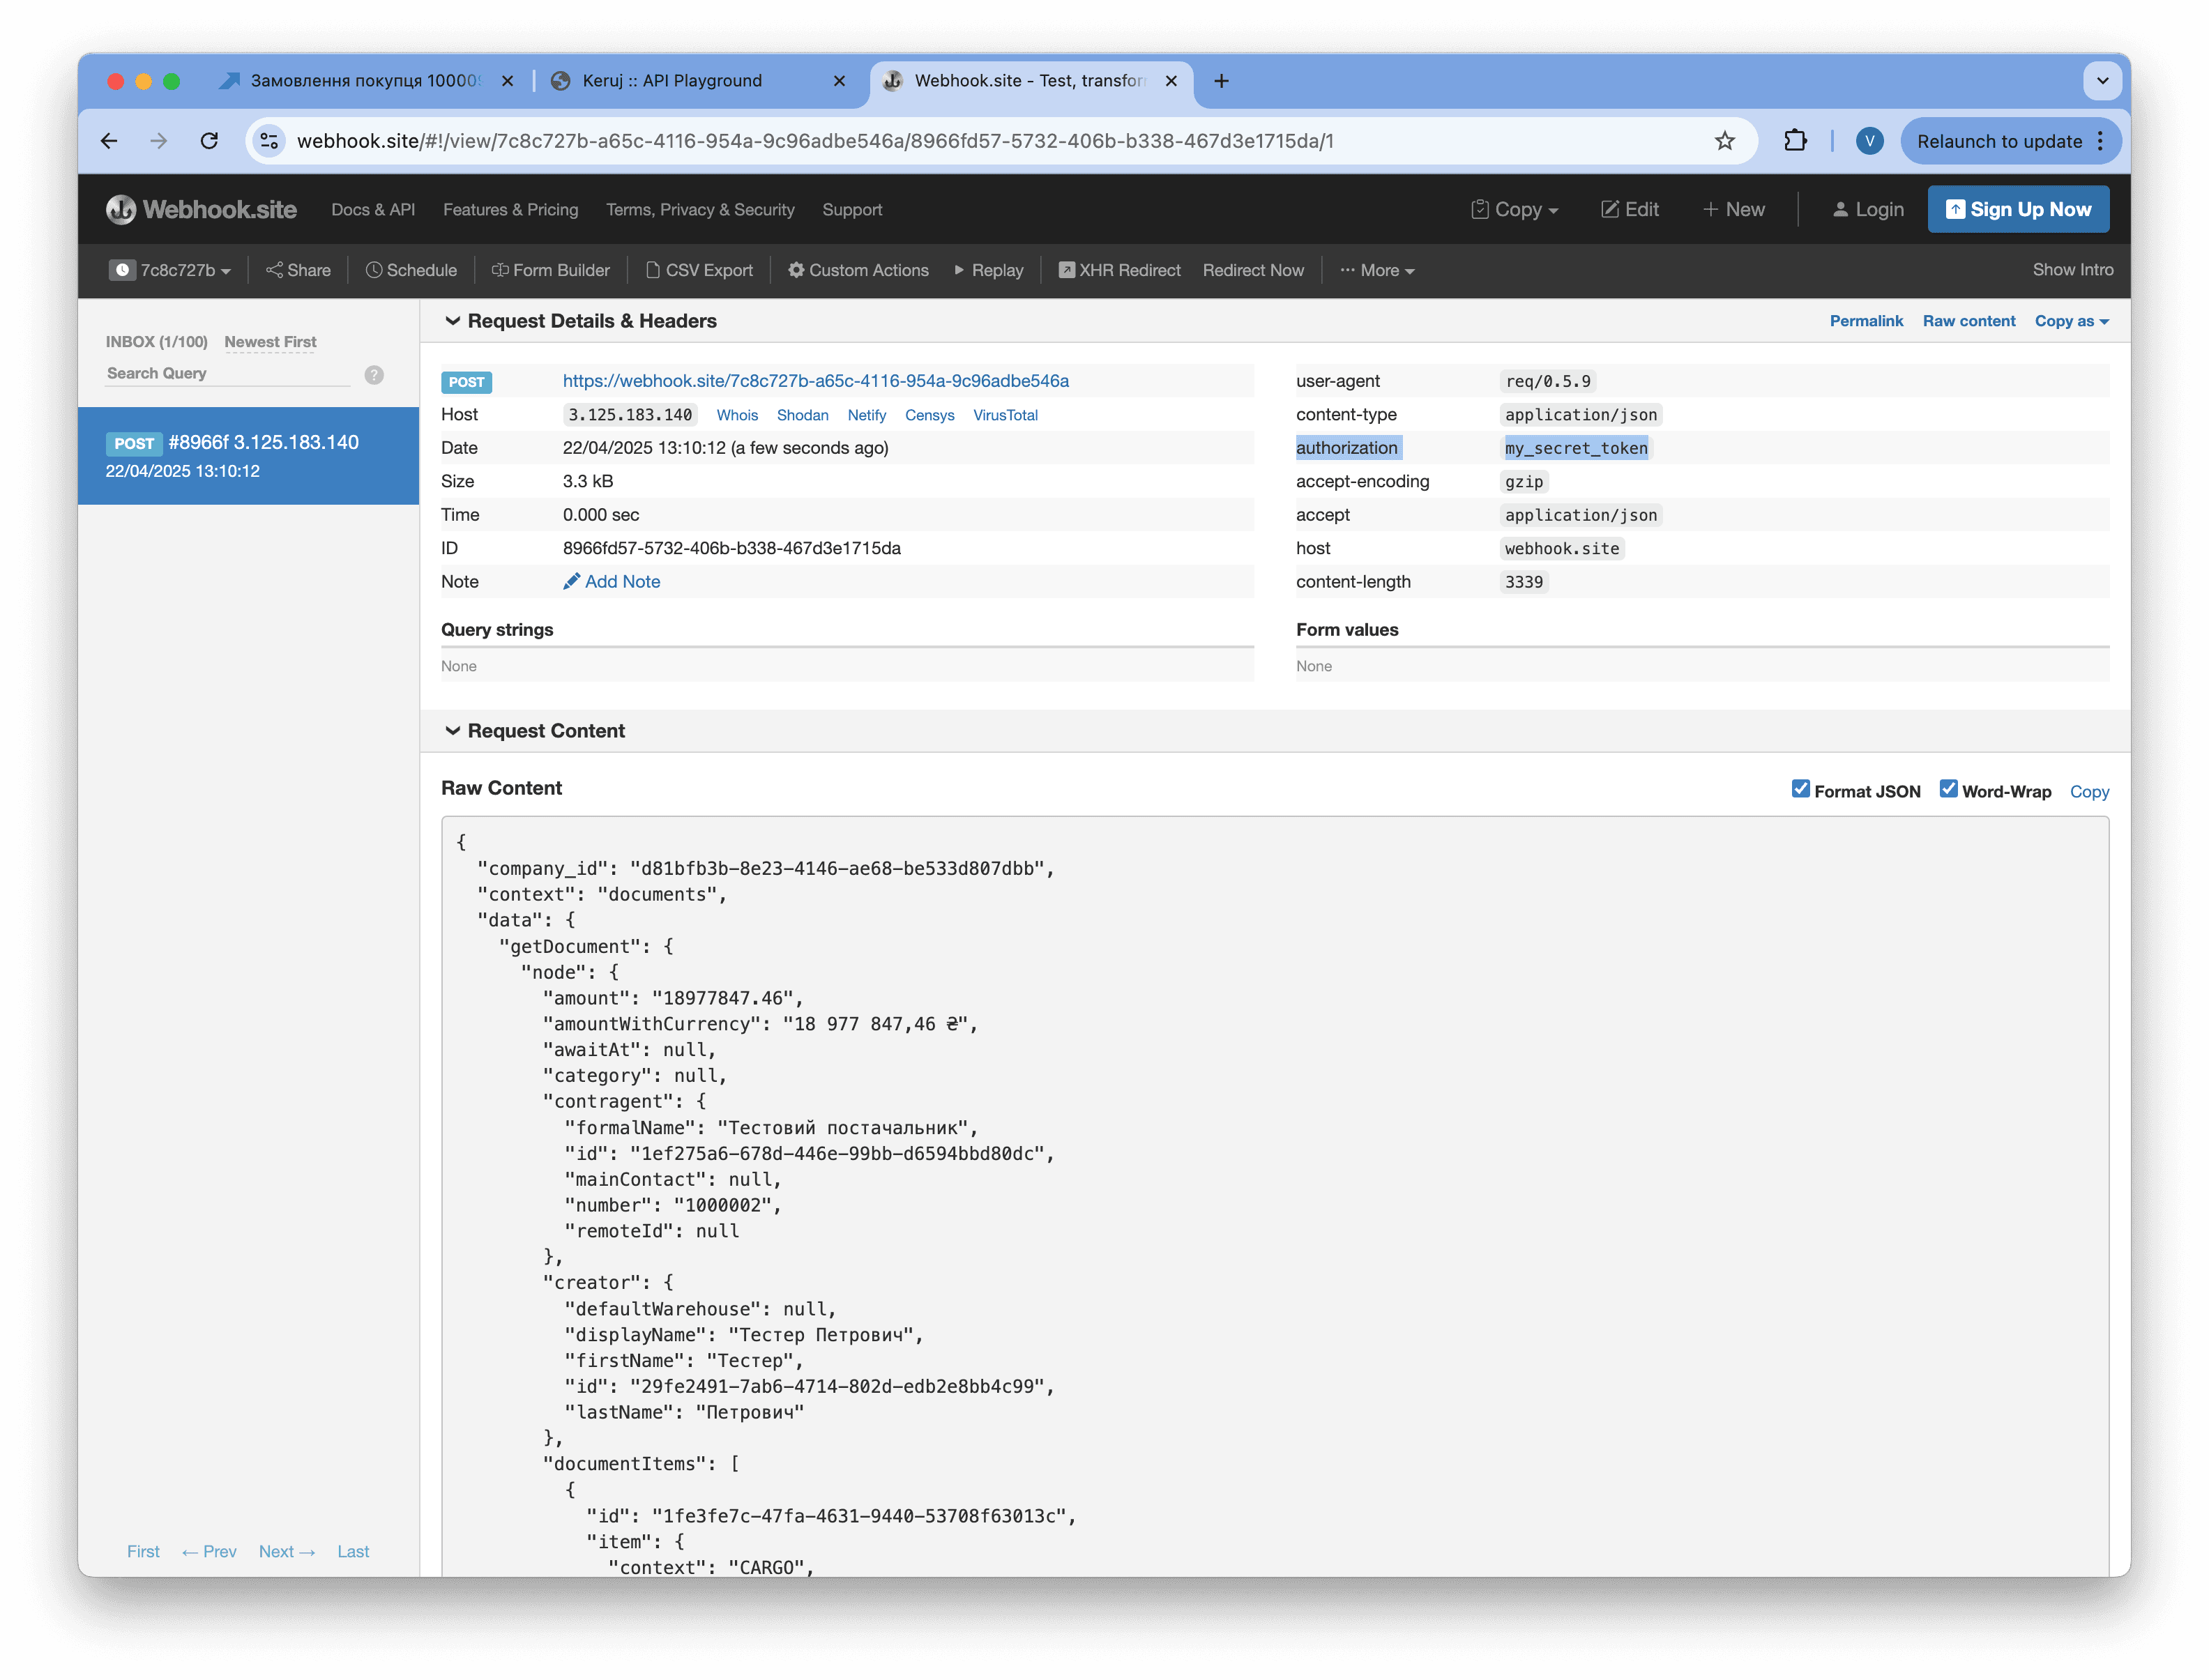
In this case, a POST HTTP request with the specified headers was sent to the specified URL.
We highly recommend using the Authorization header to authorize incoming requests to prevent unauthorized interference and data leaks.
Log

You can find the log of all sent requests under Settings / Scenarios / Executions
Errors during request execution
If for some reason the specified URL did not respond, and the response status is other than code 2xx, then Keruj will retry with a certain interval. In total, a maximum of 10 attempts will be made, after which the execution will complete with an error
Serializer
Standard
By default, Keruj suggests using the standard data serializer, which will use query parameters familiar to you from the API such as getDocument and others depending on the execution context. You can influence the data format received in the request by changing the serializer type.
Modified

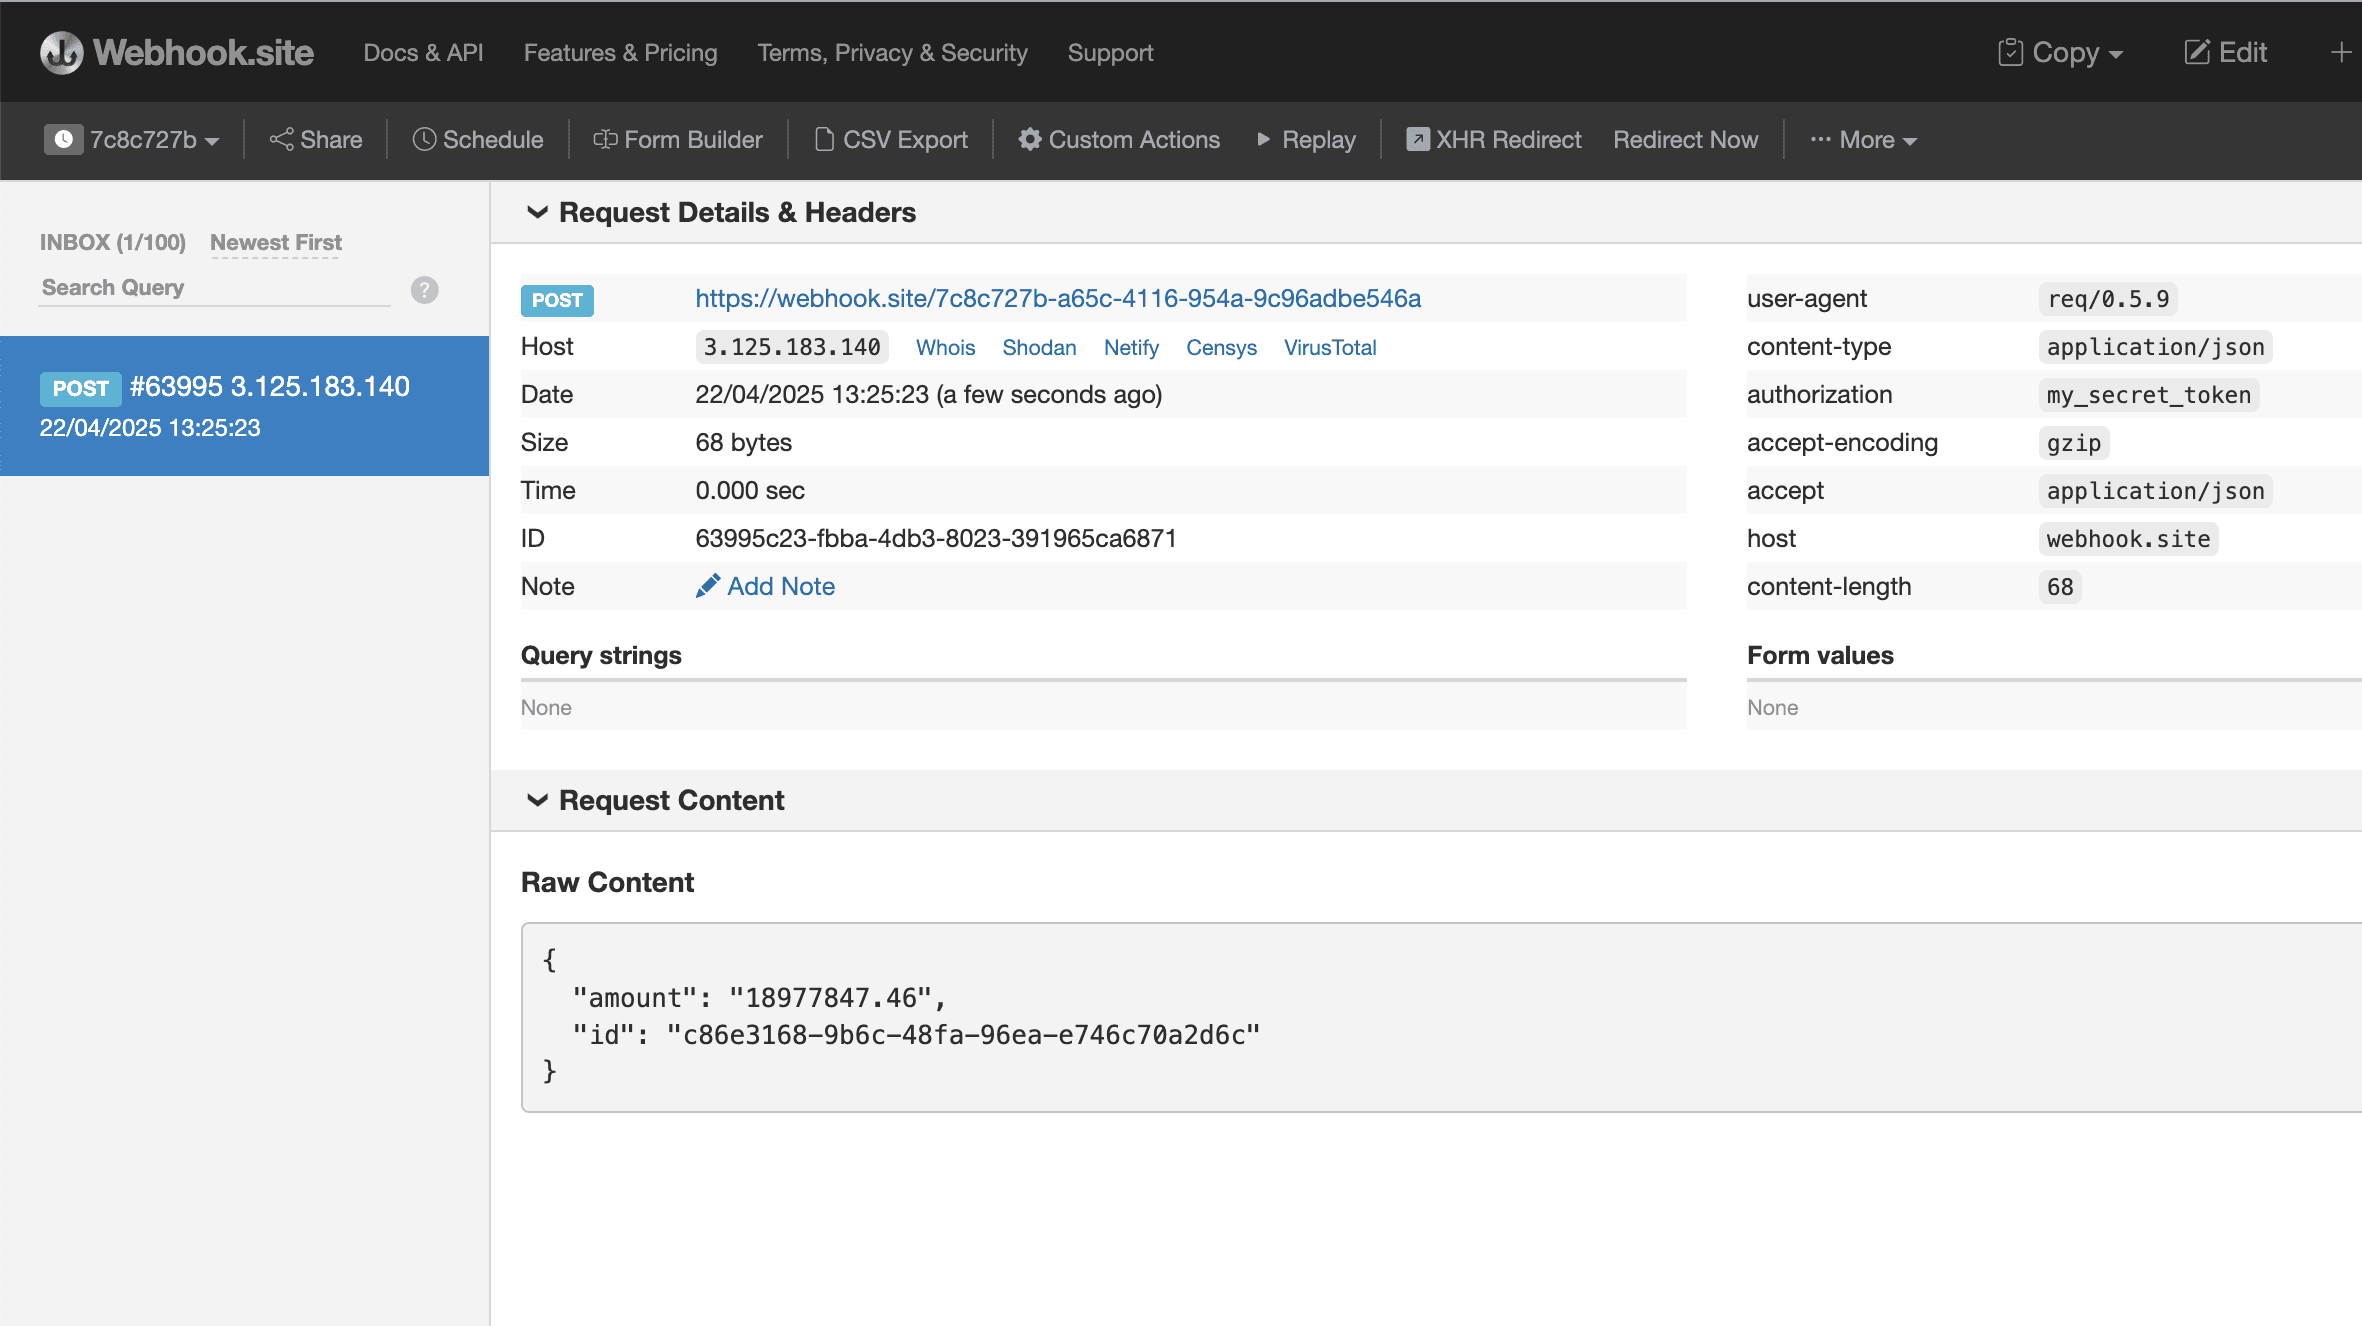
Allows you to specify only the fields you need
In this case, when forming the data block, the getDocument query will return a limited number of fields
Custom

Gives you full control over the request body, but requires writing a `JSON` serializer using the mustache templating engine
Metadata
For standard and modified serializers, Keruj will always wrap the data block with current metadata to make it easier for you to understand the execution context
company_id- company identifiercontext- execution entityevent- event type (created/updated/deleted)run_id- execution identifierrun_number- execution sequence numberworkflow_id- scenario identifier
Variables
For convenient reuse of variables and secret keys, we recommend using the variables section.
To add a variable, you should go to Settings / Scenarios / Variables and click the Add button

Key - variable identifier. You can only use uppercase characters
A-Zand_Value - the direct value of the variable that will be used during serialization
Secret - for very important and secret values. In this case, these values will be stored in Keruj in encrypted form and no one else will be able to read them
Notes - in order not to forget what this variable is for
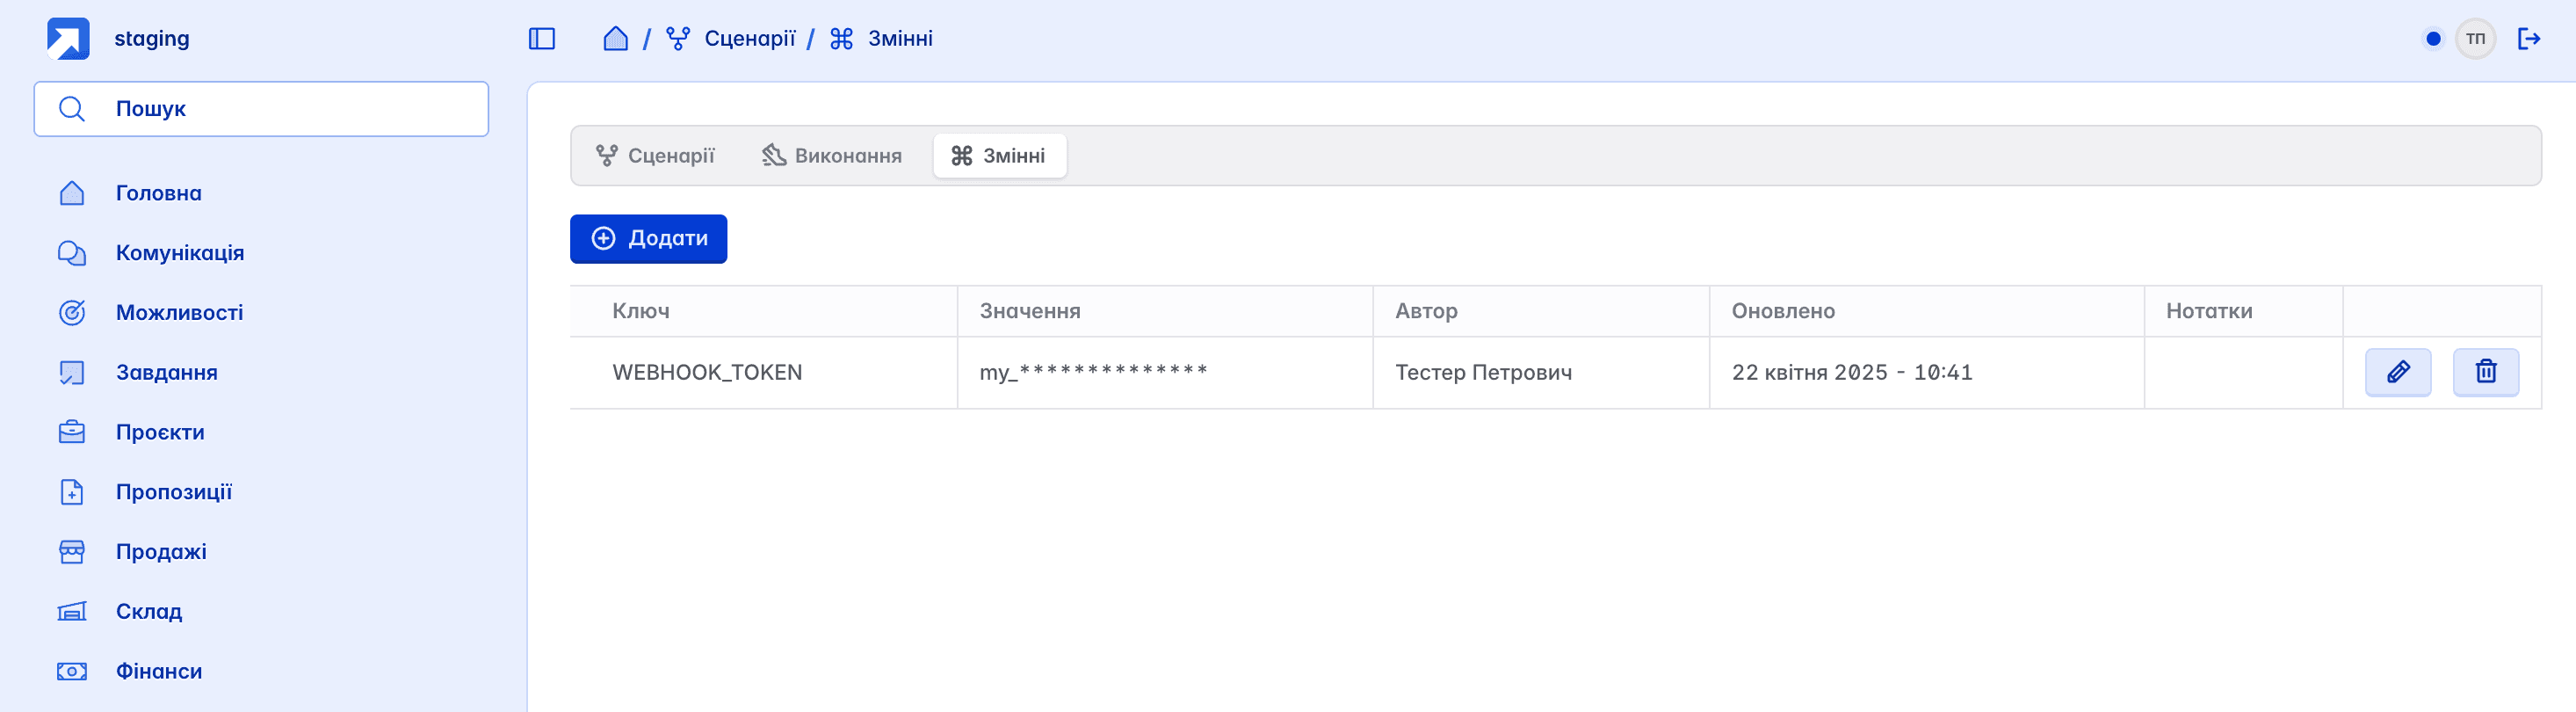
After saving, all variables will be available in the general table, but secret ones will be almost completely hidden (except for the first 3 characters)
You can use a variable value using the mustache templating engine, where inside {{..}} you simply specify the variable key
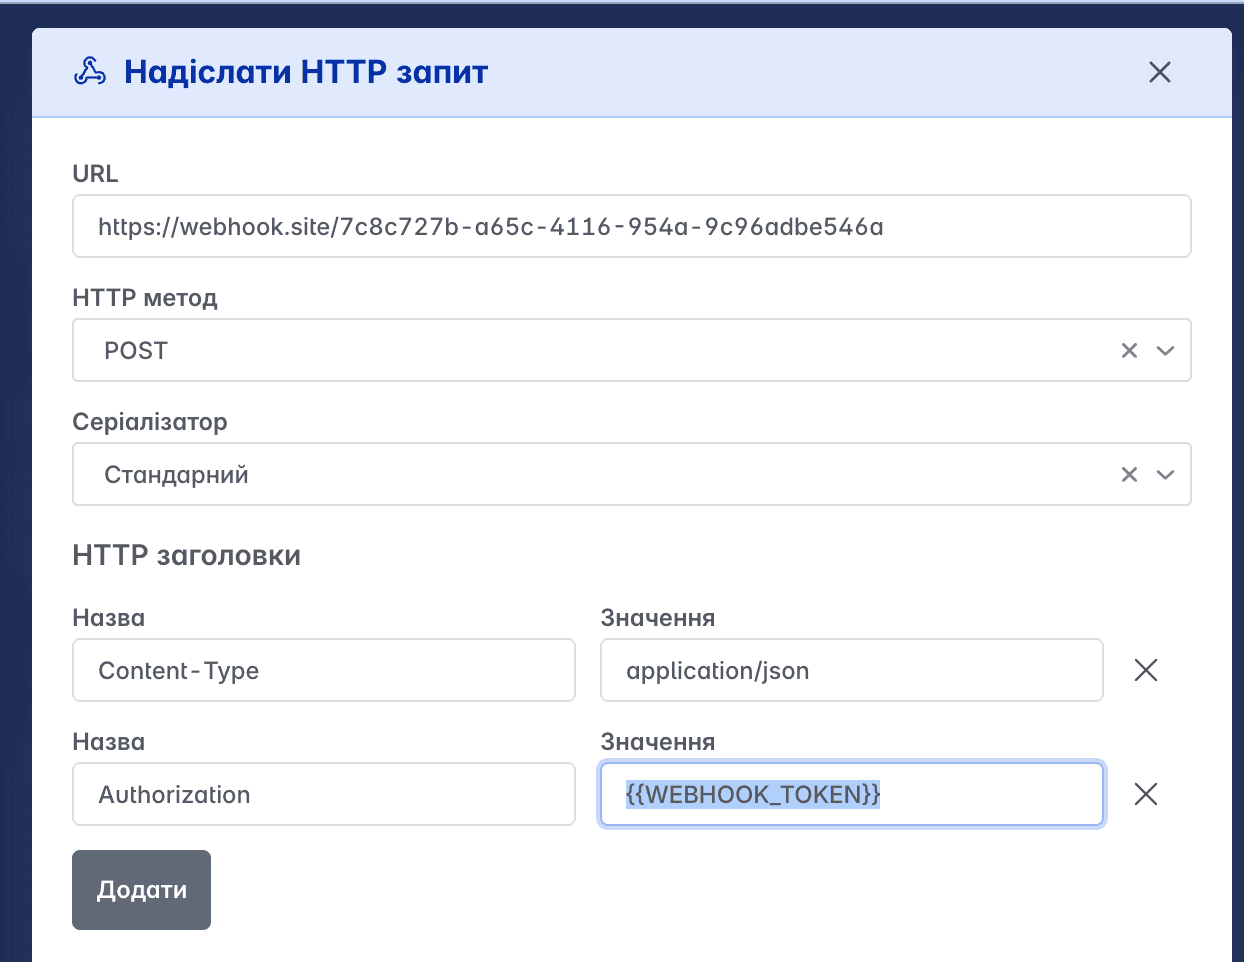
During request serialization, the variable key will be replaced with its value. This way, you can define your variables once and reuse them in all scenarios.
Successful data exchanges!
Related articles